
The Problem: Crowns That Don’t Fit Cost More Than Just Time
You’ve been here before.
The patient is scheduled. The crown arrives from the lab. You try it in — and it’s tight mesially. Or the occlusion is high. Or the margin is open by just enough that you know you can’t deliver it.
You have two choices:
- Adjust it chairside, compromising the glaze and potentially the fit.
- Send it back and wait another two weeks.
Neither is good for your schedule. Neither is good for your patient.
At Hezhan Dental Lab, we’ve seen this pattern across hundreds of cases we’ve reviewed from dentists who switched to our workflow. The root cause is almost never the material — it’s how the digital data gets interpreted.
Below is a real case walkthrough showing how we approach implant crown fabrication. It’s not magic. It’s a disciplined workflow with checkpoints designed to catch issues before they reach your chair.
Case Summary
| Parameter | Detail |
|---|---|
| Restoration Type | Screw-retained zirconia crown on implant |
| Implant System | Dentium |
| Material | Lava™ Plus Zirconia (clinic’s selection) |
| Delivery Requirement | 72 hours from design approval |
| Data Provided | Intraoral scan (STL), prescription, shade reference photos |
Step 1: Data Receiving & Pre-Check — Before Design Even Starts
Many labs import STL files and begin designing immediately. We don’t.
Our technician manually verifies three critical points first. This takes about 1–2 hours, and we consider it the most important step in the entire workflow.
1. Scan body seating verification
We check the data continuity between the scan body and the abutment interface. If the scan body appears incompletely seated — or if soft tissue obscures the margin area — we contact the clinic immediately with a specific request: “Please rescan the abutment area and confirm full seating.”
We never “fill in” missing data. That approach guarantees a compromised margin.
2. Margin location — equigingival or subgingival?
The prescription might say “subgingival 0.5mm.” We manually mark the margin depth in the software rather than relying on automatic margin detection, which often misplaces the margin in the sulcus. That error produces either a short crown or tissue impingement.
3. Contact tightness preference
If not specified, we design to a standard 30-micron contact — floss passes with resistance but not freely. We capture this setting and share it with the clinic for confirmation.
Design work begins only after the clinic approves these pre-check findings.
Our experience shows that this pre-check step eliminates a significant portion of potential remakes before they ever enter production. The 72-hour timeline starts from the moment the clinic gives design approval — not from the moment we receive the file.
Step 2: CAD Design — Manual Adjustments by Experienced Technicians
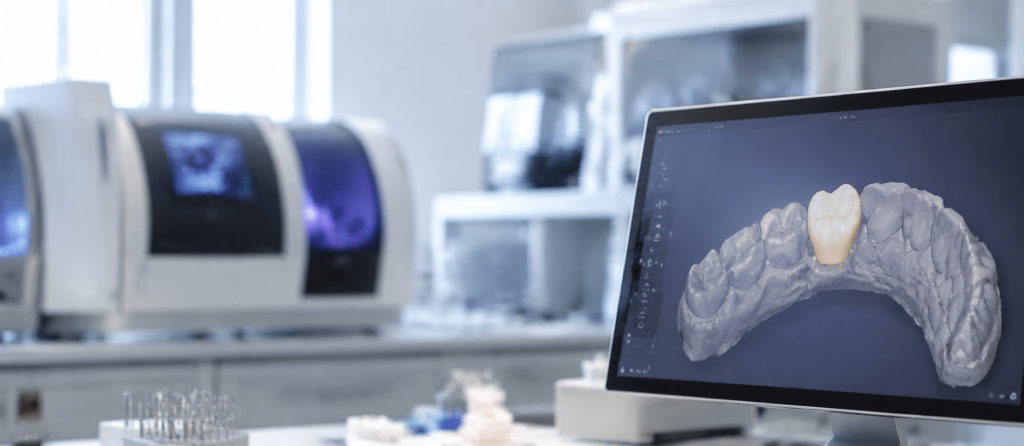
Using Exocad (and 3Shape when required), our designers perform three manual adjustments. We do not rely on “one-click” automation.
Margin tracing
Traced by hand along the preparation finish line. For subgingival margins, we maintain a minimum edge thickness of 0.8mm to prevent chipping after sintering.
Occlusal contacts
We design 1–2 working-side contact points. The non-working side is completely discluded to eliminate premature lateral contacts. This reduces chairside occlusion adjustment.
Screw channel alignment
For Dentium implants, the screw hole must be perfectly centered and perpendicular to the abutment plane. Misalignment here creates stress during clinical torqueing. Our designers verify this geometrically.
After design, we generate margin fit and occlusal clearance images and send them to the clinic for final approval before milling.
Step 3: Material Selection & Milling
The clinic chose Lava™ Plus zirconia. We also stock VITA YZ (HT and ST variants) and other brands.
This is an area where labs commonly make mistakes.
Different zirconia materials require different sintering protocols. Using the wrong program — even with the same brand — can cause shrinkage errors that result in open margins.
At Hezhan, each crown receives a unique batch number linked to its exact material specifications. We follow the manufacturer-recommended firing parameters for each specific material variant. This maintains dimensional accuracy and prevents margin discrepancies.
Our milling equipment includes 5-axis dry mills capable of producing precise implant restorations.
Milling + sintering + cooling: approximately 6 hours.
Step 4: Staining & Glazing
The clinic provided shade reference photos. We use a layered staining technique:
- Cervical: darker tone to mimic root structure
- Body: primary shade
- Incisal: translucent effect
After staining, a second low-temperature sintering cycle fixes the color. Glaze is applied with extra thickness at occlusal contacts to reduce early wear.
Staining + glazing: approximately 2 hours.
Step 5: Physical Quality Control — Tested Like You Would Test It
Microscope images are useful, but they don’t tell you how a crown behaves in the mouth.
Every crown from Hezhan passes three physical tests before shipment.
1. Seating test
We place the crown on a standard Dentium laboratory analogue and screw it down manually.
- Pass: Gradual resistance during seating, fully seated with no wobble.
- Fail: Drops in with no resistance (too loose) or won’t fully seat (internal interference).
2. Marginal integrity
Inspected under magnification and probed with an explorer along the finish line. No step, no detectable gap.
3. Contact tightness
We use dental floss through the contact area. Our standard: floss passes with distinct resistance — not too loose, not too tight.
All three tests must pass. We document the QC results with photos and include the record with the shipment.
QC: approximately 1 hour.
The Outcome
From design approval to courier drop-off, production time was 68 hours — within our 72-hour commitment.
Clinic feedback after delivery:
“The crown seated with minimal adjustment. Occlusal contacts were light and polished easily. The patient was discharged the same day.”
What This Means for Your Practice
- Pre-check saves time — we identify scan issues before they become crown issues.
- Material handling matters — sintering protocol is as important as material selection.
- 72 hours is real — but the clock starts when you approve the design, not when you send the file.
- Every crown is physically tested — digital reports are reviewed, but physical checks are our final gate.
Ready to Evaluate Our Workflow?
We understand that changing labs requires trust. That’s why we encourage dentists to start with a single case — evaluate our workflow, our communication, and the final fit.
[Submit a Case for Evaluation]
No obligation. Our technician will review your scan data and provide a design pre-check within 2 hours.
For Dental Laboratories: White-Label CAD/CAM Manufacturing Partner
Many dental labs face capacity constraints during peak periods. Others want to expand into implant restorations without investing in 5-axis mills and sintering furnaces.
Hezhan provides white-label CAD/CAM manufacturing for established dental laboratories in North America and Europe.
- Supported systems: Dentium, Nobel Biocare, Straumann, Dentsply, and more.
- Materials: Lava™, VITA, Katana, Ceramill — with correct sintering protocols for each.
- Full QC traceability available for client review.
- Your brand remains with you. We are your production backend.
If this fits your lab’s needs, contact us to discuss partnership terms.
About Hezhan Dental Lab
Hezhan Dental Lab is a digital CAD/CAM restoration manufacturer serving dentists and dental laboratories worldwide.
Our focus is zirconia crowns and bridges, implant prosthetics, custom abutments, and full-arch frameworks.
- Software: Exocad / 3Shape
- Equipment: 5-axis milling, dedicated sintering furnaces
- QC: Each crown is traceable by material batch and inspection record